新版React官方文档解读(十)- react-dom API 之 createPortal 和 flushSync
1. createPortal
createPortal 用于手动渲染动态组件。
接受参数
children: 第一个参数是一个可以被 render 的 React DOM.domNode: 第二个参数是一个真实的 DOM 节点,用于当做渲染的父容器.- 可选项
key: 第三个参数可选,作为动态组件的 key.
返回值
createPortal返回一个 React node. 在渲染时,React 会将指定的渲染组件放置在指定的 DOM 容器(domNode)内。
注意事项
- 使用 createPortal 是会事件冒泡的. 举个例子,如果你在 portal 内部点击鼠标, 这个 portal 又被
<div onClick>包裹, 则onClick事件也会被触发.
使用案例
- 往别的 div 里渲染一个组件
export default function MyComponent() {
  return (
    <div style={{ border: '2px solid black' }}>
      <p>This child is placed in the parent div.</p>
      {createPortal(
        <p>This child is placed in the document body.</p>,
        document.body
      )}
    </div>
  );
}
看看界面,确实渲染在 body 下,原来的位置空空如也:

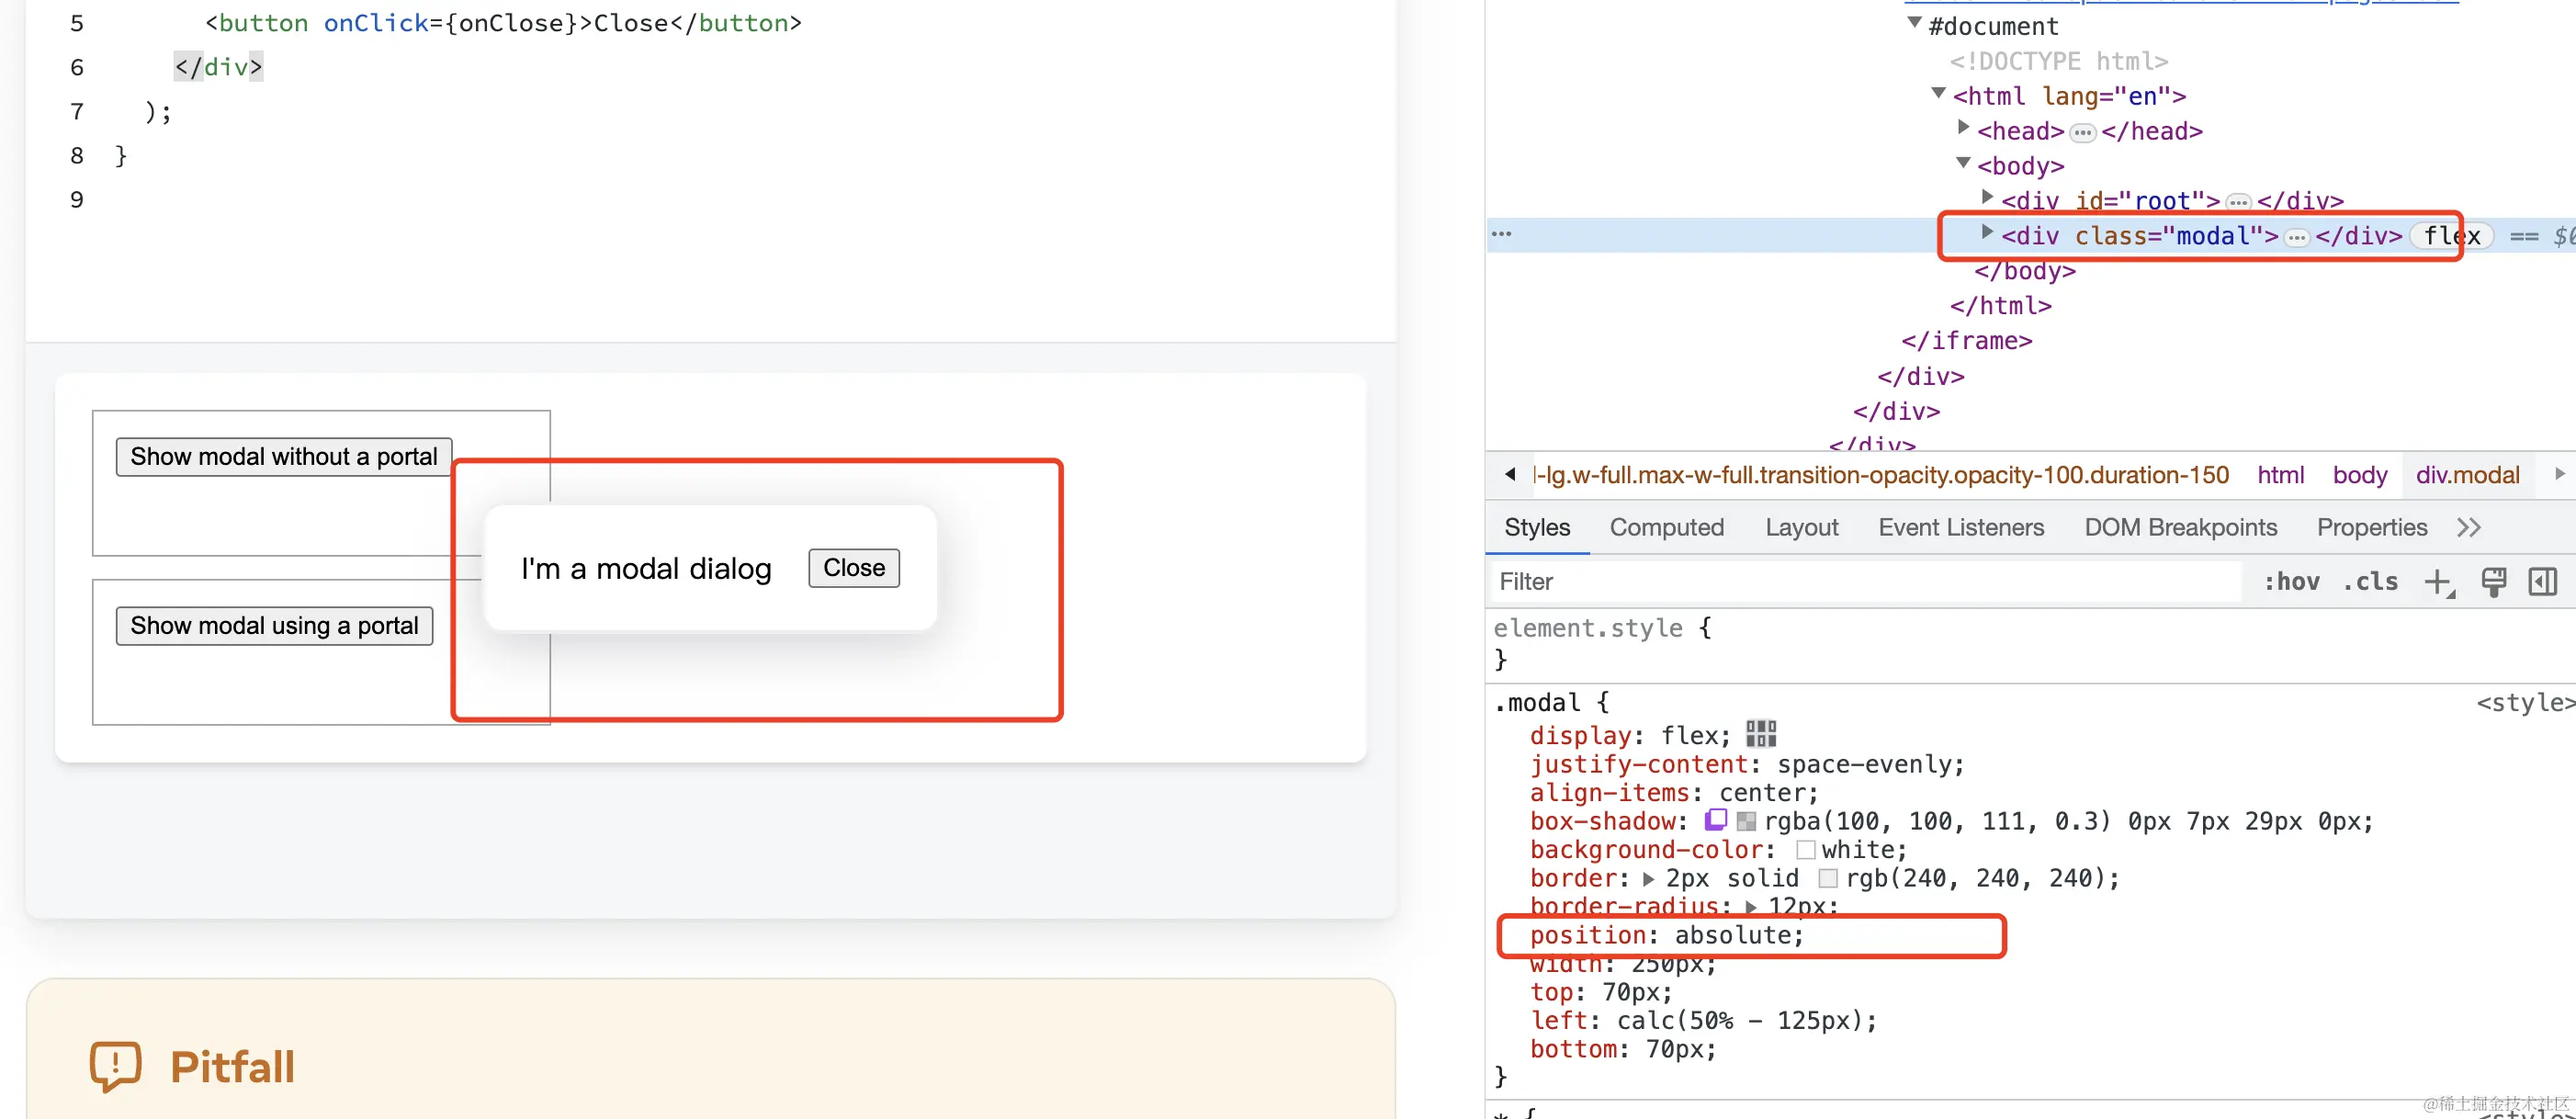
- 实现一个弹窗
如果你写过 UI 库,上面的 DOM 结构你可能会比较熟悉,这就是弹出层组件常用的插入方式。我们就用上面的原理,实现一个简单的弹窗,
export default function PortalExample() {
  const [showModal, setShowModal] = useState(false);
  return (
    <>
      <button onClick={() => setShowModal(true)}>
        Show modal using a portal
      </button>
      {showModal && createPortal(
        <ModalContent onClose={() => setShowModal(false)} />,
        document.body
      )}
    </>
  );
}
如果不使用 createPortal,在 showModal 时,ModalContent 组件会追加在按钮下面,如果设置了绝对定位后,也只是针对上一级组件的偏移,而弹窗理应是个全局性的组件。我们看看运行效果:
- 服务端渲染时,往独立的 html 中渲染
服务端渲染时,会存在脱离 React 环境的页面 (比如 React root 只作为 web 项目的一部分时),使用这个方法就可以实现渲染:
const sidebarContentEl = document.getElementById('sidebar-content');

...
<>
  <MainContent />
  {createPortal(
    <SidebarContent />,
    sidebarContentEl
  )}
</>
- 将只支持 js 引入方式的第三方库渲染为 React 组件
有的第三方库只提供了 js 引入方式,比如 地图组件 leaflet:
// map-widget.js
import 'leaflet/dist/leaflet.css';
import * as L from 'leaflet';

export function createMapWidget(containerDomNode) {
  const map = L.map(containerDomNode);
  map.setView([0, 0], 0);
  L.tileLayer('https://tile.openstreetmap.org/{z}/{x}/{y}.png', {
    maxZoom: 19,
    attribution: '© OpenStreetMap'
  }).addTo(map);
  return map;
}

export function addPopupToMapWidget(map) {
  const popupDiv = document.createElement('div');
  L.popup()
    .setLatLng([0, 0])
    .setContent(popupDiv)
    .openOn(map);
  return popupDiv;
}
上面的两个函数都不是组件,我们不能在React组件中直接引用。
看下面的处理:
import { useRef, useEffect, useState } from 'react';
import { createPortal } from 'react-dom';
import { createMapWidget, addPopupToMapWidget } from './map-widget.js';

export default function Map() {
  const containerRef = useRef(null);
  const mapRef = useRef(null);
  const [popupContainer, setPopupContainer] = useState(null);

  useEffect(() => {
    if (mapRef.current === null) {
      const map = createMapWidget(containerRef.current);
      mapRef.current = map;
      const popupDiv = addPopupToMapWidget(map);
      setPopupContainer(popupDiv);
    }
  }, []);

  return (
    <div style={{ width: 250, height: 250 }} ref={containerRef}>
      {popupContainer !== null && createPortal(
        <p>Hello from React!</p>,
        popupContainer
      )}
    </div>
  );
}
上面的代码,使用 React 状态 popupContainer 接受了地图返回的容器 div,并包裹在组件 Map 中返回。如此,这个组件就可以被外部组件调用了。
2. flushSync
flushSync 用于强制刷新 React 所有已经挂起的渲染工作,并同步更新组件树。
在默认情况下,React 使用异步更新策略,这意味着在调用 setState 或 forceUpdate 等更新方法后,React 将在事件循环的当前迭代中批量更新组件,而不是立即更新(可以了解一下 fiber 的调度原理)。这种异步更新策略可以提高性能,但有时候我们需要立即更新组件,这就是 flushSync 的用途。
flushSync 方法可以强制 React 立即执行当前批次的所有更新,而不是等待事件循环的下一个迭代。
滥用会损害性能,最好不用。
接受参数
callback: 接受一个函数。会立即被调用,并刷新状态。同时也会刷新阻塞的更新任务、副作用等。
注意事项
flushSync会显著影响性能.flushSync可能强制阻塞 Suspense 组件,以至于 fallback 无法显示.
使用案例
- 同一周期内渲染的问题
有时候想要在同一个渲染周期内获取到最新的 state 的值,比如下面的打印机的例子:
import { useState, useEffect } from 'react';

export default function PrintApp() {
  const [isPrinting, setIsPrinting] = useState(false);

  useEffect(() => {
    function handleBeforePrint() {
      setIsPrinting(true);
    }

    function handleAfterPrint() {
      setIsPrinting(false);
    }

    window.addEventListener('beforeprint', handleBeforePrint);
    window.addEventListener('afterprint', handleAfterPrint);
    return () => {
      window.removeEventListener('beforeprint', handleBeforePrint);
      window.removeEventListener('afterprint', handleAfterPrint);
    }
  }, []);

  return (
    <>
      <h1>isPrinting: {isPrinting ? 'yes' : 'no'}</h1>
      <button onClick={() => window.print()}>
        Print
      </button>
    </>
  );
}
beforeprint 事件在调用打印页面时会被立即调用,但是你会发现,在界面上,isPrinting 却是 no。这是因为更新 state 的任务放入队列后,打印弹窗打开了,阻塞了任务。所以我们需要强制渲染:
function handleAfterPrint() {
  flushSync(() => {
    setIsPrinting(false);
  })
}
这样,就会在打印弹窗打开的同时,同步渲染 UI 了。
到这里,常规的 API 就介绍完了,之后的系列文章就开始介绍客户端与服务端渲染的相关API了,敬请期待~~